Readers like you help support Explaining Android. When you make a purchase using links on this site, I may earn an affiliate commission.
Do you know exactly which fingerprints are registered to unlock your Google Pixel? Most users enroll a few fingers during setup and never think about them again. This can leave you with a list of generic names like “Fingerprint 1” and “Fingerprint 2,” creating a potential security risk if an old, forgotten, or even unauthorized print is saved on your device.
Thankfully, Google is introducing a simple solution. A new feature in Android 16 allows Pixel owners to quickly verify which saved entry corresponds to which finger, making it easier than ever to audit your phone’s biometric security.
Why You Should Verify Your Enrolled Fingerprints
Performing this quick digital audit is a smart security habit. The benefits include:
- Identifying and Removing Unauthorized Prints
- Easily discover if a friend or family member ever added their fingerprint to your device without your knowledge.
- Cleaning Up Old or Corrupt Data
- A fingerprint that was poorly scanned during enrollment can cause recognition errors. This feature helps you identify and delete faulty entries to improve scanner accuracy.
- Properly Naming Each Print
- It’s the perfect opportunity to finally rename “Fingerprint 1” to “Right Thumb,” providing clarity and better organization.
How to Verify Your Fingerprints on a Pixel
This feature is being introduced with the Android 16 QPR1 Beta and will roll out to all supported Pixel devices in a future stable update. Once your device is updated, follow these steps.
- Open the Settings app.
- Scroll down and tap on Security & Privacy.
- Select Device Unlock.
- Tap on Fingerprint Unlock. You will be prompted to enter your backup PIN, pattern, or password.
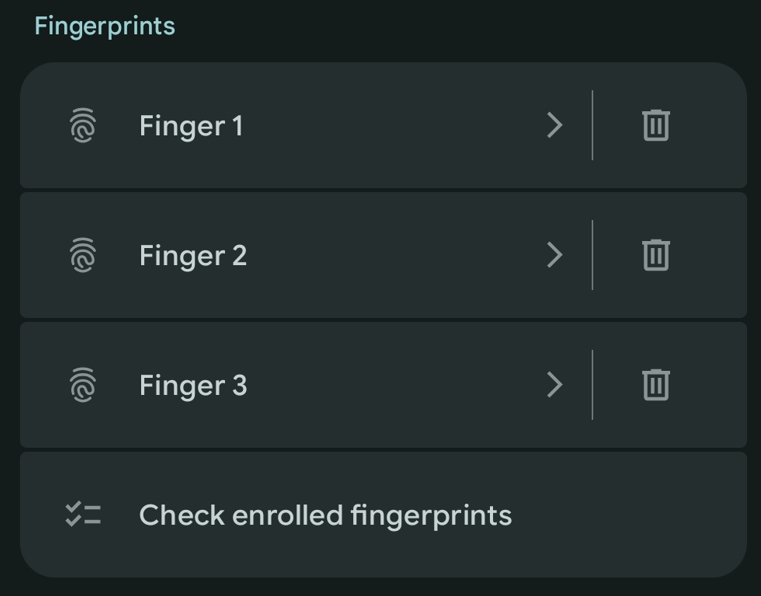
- At the bottom of the list of your saved fingerprints, tap the new option labeled “Check Enrolled Fingerprints.”
- A new screen will appear, prompting you to touch the fingerprint sensor.
- Place one of your fingers on the sensor. If it matches a saved entry, that entry in the list will briefly flash or be highlighted.

What to Do After Verifying Your Prints
Once you have identified your saved fingerprints, take these steps to improve your device’s security.
- Rename Known Prints
- For each fingerprint you verify, tap on its current name (e.g., “Fingerprint 1”) and type in a descriptive label like “Left Index” or “Right Thumb.”
- Delete Unknown Prints
- If an entry remains in the list that you cannot identify after checking all your fingers, it is highly recommended you delete it. Tap the trash can icon next to the unknown print to permanently remove it.
Conclusion
Regularly auditing the fingerprints saved on your phone is a fast and simple step to ensure your device remains as secure as possible. This long-awaited quality-of-life feature for Google Pixel phones empowers you to take direct control of your biometric data, giving you peace of mind that only you can access your device.
Frequently Asked Questions (FAQ)
When will this feature be available for everyone?
This feature first appeared in the Android 16 QPR1 Beta. It is expected to be included in the corresponding stable public Android 16 update, which will roll out to all supported Pixel devices later this year.
What if I scan my finger and nothing is highlighted?
This indicates that the finger you are scanning does not match any of the fingerprints currently saved and enrolled on your device.
Do other Android phones have this feature?
Yes, some other manufacturers have included a similar fingerprint verification feature in their software for a while. This is a new and welcome addition for Google’s own Pixel smartphone lineup.

